Here are the Code examples of this chapter. These pages are currently being updated over time (adding pictures, captions, and possibly further examples). Visit again soon for updates. Of course, the best way to use this page is together with the book for getting the explanations.
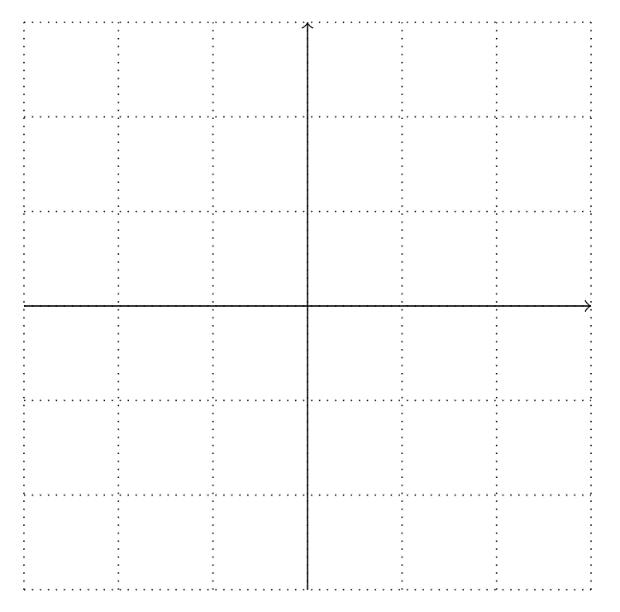
Figure 2.1 – A rectangular grid
\documentclass[tikz,border=10pt]{standalone}
\begin{document}
\begin{tikzpicture}
  \draw[thin,dotted] (-3,-3) grid (3,3);
  \draw[->] (-3,0) -- (3,0);
  \draw[->] (0,-3) -- (0,3);
\end{tikzpicture}
\end{document}
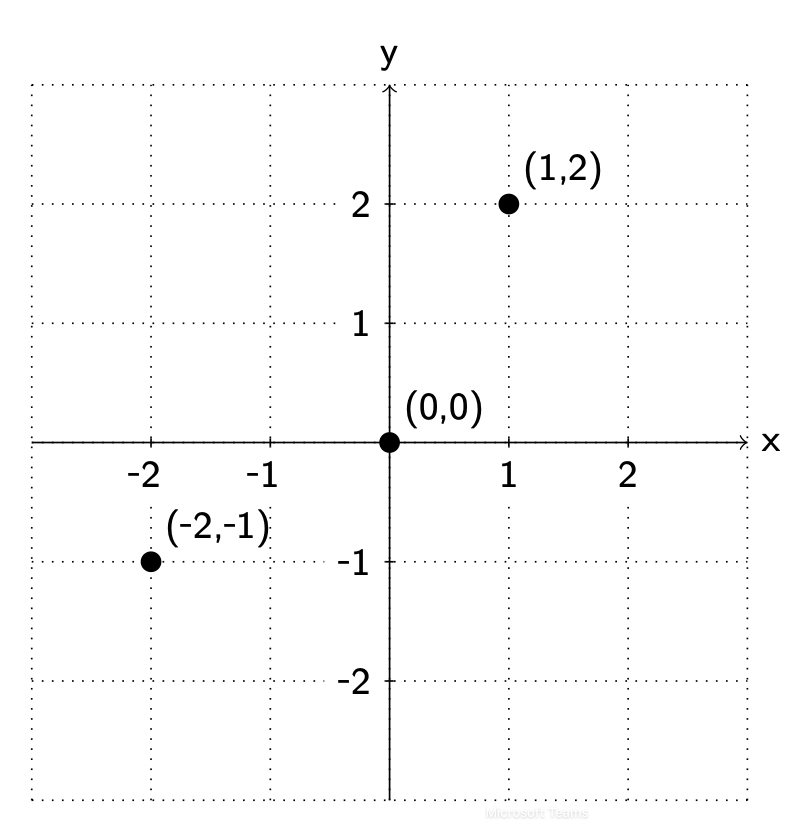
Figure 2.2 – Cartesian coordinate system
(Not book tutorial code, but my illustration source code)
\documentclass[tikz,border=10pt]{standalone}
\usetikzlibrary{calc}
\newcommand{\minus}{\raisebox{0.96pt}{-}}
\begin{document}
\begin{tikzpicture}[every node/.style={font=\sffamily\small}]
  \draw[thin,dotted] (-3,-3) grid (3,3);
  \draw[->] (-3,0) -- (3,0) node[right] {x};
  \draw[->] (0,-3) -- (0,3) node[above] {y};
  \foreach \x/\xlabel in {-2/{\minus 2\hphantom{-}}, -1/{\minus 1\hphantom{-}}, 1/1, 2/2}
    \draw (\x cm,1pt ) -- (\x cm,-1pt ) node[anchor=north,fill=white] {\xlabel};
  \foreach \y/\ylabel in {-2/{\minus 2}, -1/{\minus 1}, 1/1, 2/2}
    \draw (1pt,\y cm) -- (-1pt ,\y cm) node[anchor=east, fill=white] {\ylabel};%  \draw[fill=black] (-1,1) circle (0.08);
  \draw[fill=black] (-2,-1) circle (0.08) node[above right] {\footnotesize (\raisebox{0.8pt}{-}2,\raisebox{0.8pt}{-}1)};
  \draw[fill=black] (0,0) circle (0.08) node[above right] {\footnotesize (0,0)};
  \draw[fill=black] (1,2) circle (0.08) node[above right] {\footnotesize (1,2)};
\end{tikzpicture}
\end{document}
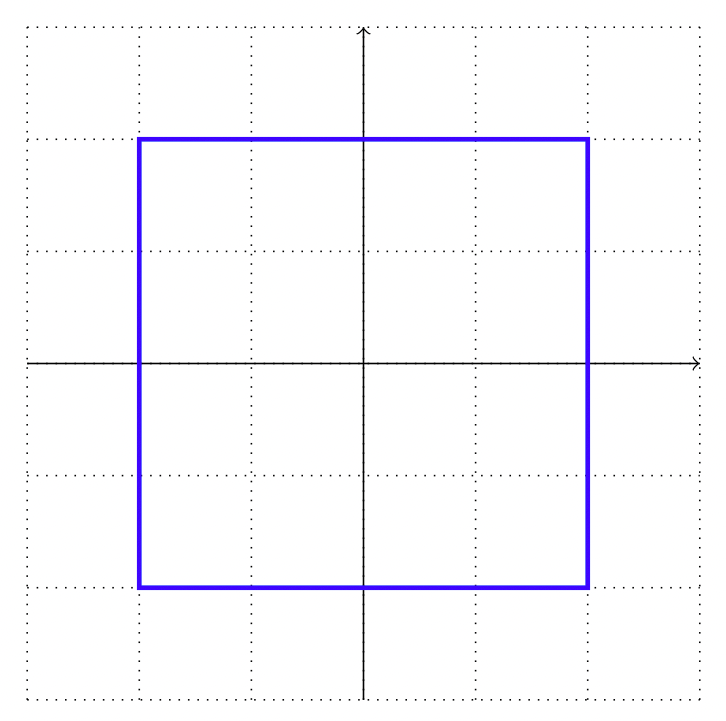
Figure 2.3 – A square in Cartesian coordinates
\documentclass[tikz,border=10pt]{standalone}
\begin{document}
\begin{tikzpicture}
  \draw[thin,dotted] (-3,-3) grid (3,3);
  \draw[->] (-3,0) -- (3,0);
  \draw[->] (0,-3) -- (0,3);
  \draw[very thick, blue] (-2,-2) -- (-2,2)
  -- (2,2) -- (2,-2) -- cycle;
\end{tikzpicture}
\end{document}
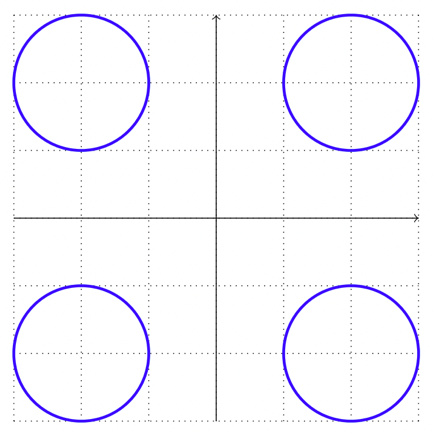
Figure 2.4 – Circles in Cartesian coordinates
\documentclass[tikz,border=10pt]{standalone}
\begin{document}
\begin{tikzpicture}
  \draw[thin,dotted] (-3,-3) grid (3,3);
  \draw[->] (-3,0) -- (3,0);
  \draw[->] (0,-3) -- (0,3);
  \draw[very thick, blue] (-2,-2) circle (1) (-2,2)
    circle (1) (2,2) circle (1) (2,-2) circle (1);
\end{tikzpicture}
\end{document}
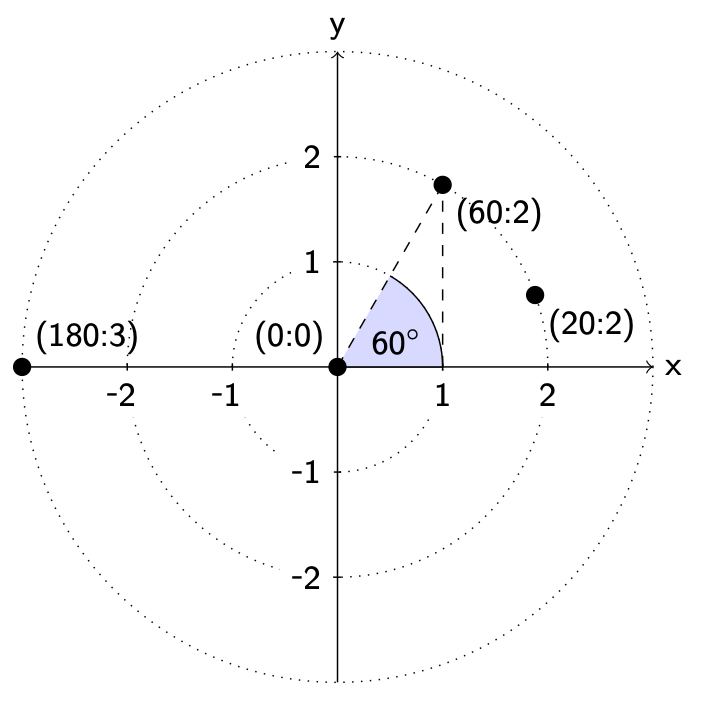
Figure 2.5 – Polar coordinate system
(Not book tutorial code, but my illustration source code)
\documentclass[tikz,border=10pt]{standalone}
\usetikzlibrary{calc}
\newcommand{\minus}{\raisebox{0.96pt}{-}}
\begin{document}
\begin{tikzpicture}[every node/.style={font=\sffamily\small}]
  \draw[thin,dotted] circle (1) circle (2) circle (3);
  \draw[->] (-3,0) -- (3,0) node[right] {x};
  \draw[->] (0,-3) -- (0,3) node[above] {y};
  \foreach \x/\xlabel in {-2/{\minus 2\hphantom{-}}, -1/{\minus 1\hphantom{-}}, 1/1, 2/2}
    \draw (\x cm,1pt ) -- (\x cm,-1pt ) node[anchor=north,fill=white] {\xlabel};
  \foreach \y/\ylabel in {-2/{\minus 2}, -1/{\minus 1}, 1/1, 2/2}
    \draw (1pt,\y cm) -- (-1pt ,\y cm) node[anchor=east, fill=white] {\ylabel};
  \draw[fill=black] (60:2) circle (0.08)   node[below right] {(60:2)};
  \draw [fill=blue!15](0,0) -- (1,0) arc (0:60:1cm);
  \draw[fill=black] circle (0.08) node[above left] {(0:0)}
    node [above right,xshift=0.2cm] {60${}^\circ$};
  \draw [dashed](0,0) -- (60:2);
  \draw [dashed](1,0) -- (60:2);
  \draw[fill=black] (20:2) circle (0.08)   node[below right] {(20:2)};
  \draw[fill=black] (180:3) circle (0.08)   node[above right] {(180:3)};
\end{tikzpicture}
\end{document}
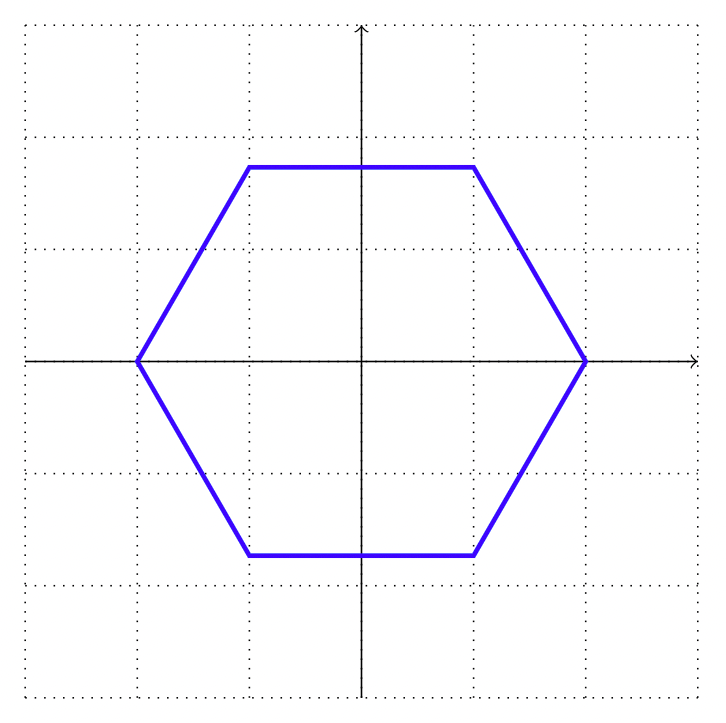
Figure 2.6 – A hexagon in polar coordinates
\documentclass[tikz,border=10pt]{standalone}
\begin{document}
\begin{tikzpicture}
  \draw[thin,dotted] (-3,-3) grid (3,3);
  \draw (-3,0) -- (3,0);
  \draw (0,-3) -- (0,3);
  \draw[very thick, blue] (0:2) -- (60:2) -- (120:2)
    -- (180:2) --(240:2) -- (300:2) -- cycle;
\end{tikzpicture}
\end{document}
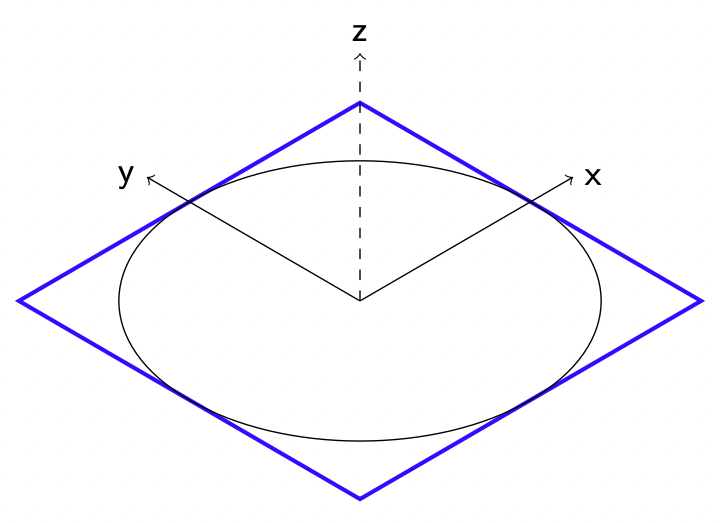
Figure 2.7 – The square and circle in three dimensions
\documentclass[tikz,border=10pt]{standalone}
\begin{document}
\begin{tikzpicture}[y={(-0.86cm,0.5cm)},x={(0.86cm,0.5cm)}, z={(0cm,1cm)},font=\sffamily]
  \draw[very thick, blue] (-2,-2,0) -- (-2,2,0) -- (2,2,0) -- (2,-2,0) -- cycle;
  \draw[->] (0,0,0) -- (2.5, 0,  0) node [right] {x};
  \draw[->] (0,0,0) -- (0,  2.5, 0) node [left] {y};
  \draw[->,dashed] (0,0,0) -- (0,  0, 2.5) node [above] {z};
  \draw circle (2);
\end{tikzpicture}
\end{document}
Figure 2.8 – Drawing with relative coordinates
\documentclass[tikz,border=10pt]{standalone}
\begin{document}
\begin{tikzpicture}
  \draw[thin,dotted] (-3,-3) grid (3,3);
  \draw[->] (-3,0) -- (3,0);
  \draw[->] (0,-3) -- (0,3);
  \draw[very thick, blue] (-3,-1) -- +(1,0) -- +(2,2) -- +(4,2) --+(5,0) -- + (6,0);
\end{tikzpicture}
\end{document}
Alternative syntax:
\documentclass[tikz,border=10pt]{standalone}
\begin{document}
\begin{tikzpicture}
  \draw[thin,dotted] (-3,-3) grid (3,3);
  \draw[->] (-3,0) -- (3,0);
  \draw[->] (0,-3) -- (0,3);
  \draw[very thick, blue] (-3,-1) -- ++(1,0) -- ++(1,2) -- ++(2,0) --++ (1,-2) -- ++ (1,0);
\end{tikzpicture}
\end{document}
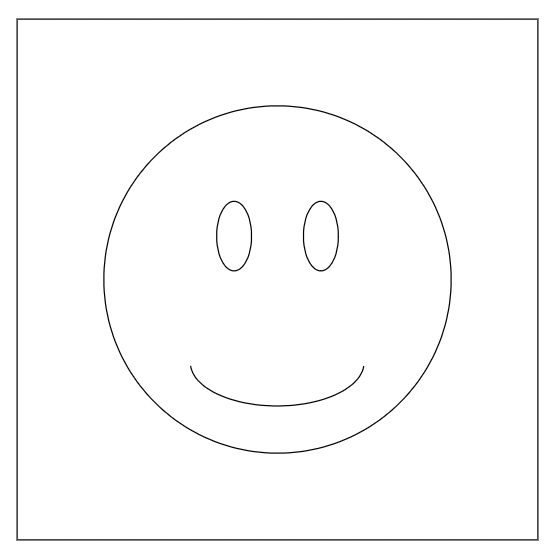
Figure 2.9 – A smiley in a rectangle
\documentclass[tikz,border=10pt]{standalone}
\begin{document}
\begin{tikzpicture}
  \draw (0,0) circle [radius=2];
  \draw (-0.5,0.5,0) ellipse [x radius=0.2, y radius=0.4];
  \draw (0.5,0.5) ellipse [x radius=0.2, y radius=0.4];
  \draw (-1,-1) arc [start angle=185, end angle=355,
    x radius=1, y radius=0.5];
  \draw (-3,-3) rectangle (3,3);
\end{tikzpicture}
\end{document}

Figure 2.10 – A smiley with color
\documentclass[tikz,border=10pt]{standalone}
\begin{document}
\begin{tikzpicture}
  \draw[fill=yellow] (0,0) circle [radius=2];
  \draw[fill=black] (-0.5,0.5,0) ellipse [x radius=0.2, y radius=0.4];
  \draw[fill=black] (0.5,0.5,0) ellipse [x radius=0.2, y radius=0.4];
  \draw[very thick] (-1,-1) arc [start angle=185, end angle=355,
    x radius=1, y radius=0.5];
\end{tikzpicture}
\end{document}

Figure 2.11 – A smiley with a three-dimensional appearance
\documentclass[tikz,border=10pt]{standalone}
\begin{document}
\begin{tikzpicture}
  \draw[shading=ball, ball color=yellow] (0,0) circle [radius=2];
  \draw[shading=ball, ball color=black] (-0.5,0.5,0) ellipse [x radius=0.2, y radius=0.4];
  \draw[shading=ball, ball color=black] (0.5,0.5,0) ellipse [x radius=0.2, y radius=0.4];
  \draw[very thick] (-1,-1) arc [start angle=185, end angle=355,
    x radius=1, y radius=0.5];
\end{tikzpicture}
\end{document}
Please rate (and possibly review) the book on Amazon if you got it there, your feedback means much to me and helps to get an extended second edition!
Go to next chapter.