Here are the Code examples of this chapter. These pages are currently being updated over time (adding pictures, captions, and possibly further examples). Visit again soon for updates. Of course, the best way to use this page is together with the book for getting the explanations.

Figure 15.1 – A duck in water with flashy clothes and a signpost
\documentclass[tikz,border=10pt]{standalone}
\usepackage{tikzducks}
\begin{document}
\begin{tikzpicture}
  \duck[crazyhair=brown!60!black, glasses, eyebrow,
    signpost=TikZ, speech=Use it!, laughing,
    jacket=orange, lapel, buttons, water]
\end{tikzpicture}
\end{document}
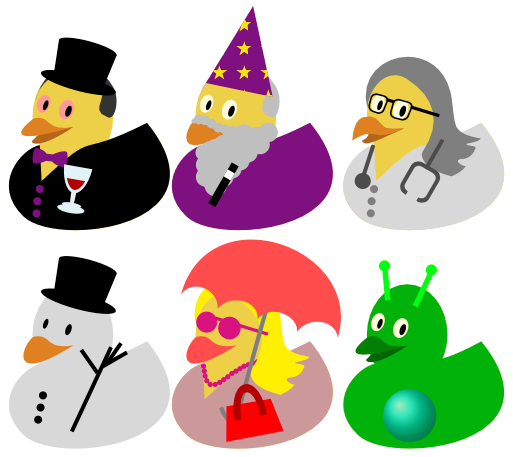
Figure 15.2 – Ducks with various styles and accessories
\documentclass[tikz,border=10pt]{standalone}
\usepackage{tikzducks}
\begin{document}
\begin{tikzpicture}
\node [matrix] {
  \duck[laughing, tophat, bowtie=violet, jacket=black,
    buttons=violet, recedinghair=black!80,
    wine, eye=red!40] &
  \duck[magichat, recedinghair=lightgray,
      jacket=violet, beard=lightgray, magicwand] &
  \duck[parrot, stethoscope=black!70, jacket=gray!30,
      buttons=gray, squareglasses, longhair=gray] \\
  \duck[snowduck=lightgray!60] &
  \duck[umbrella=red!70, handbag=red, bill=red!70,
    jacket=pink!80!black, longhair=yellow,
    necklace=magenta, sunglasses=magenta] &
  \duck[alien, body=green!70!black, crystalball,
    bill=green!50!black, laughing] \\ };
\end{tikzpicture}
\end{document}
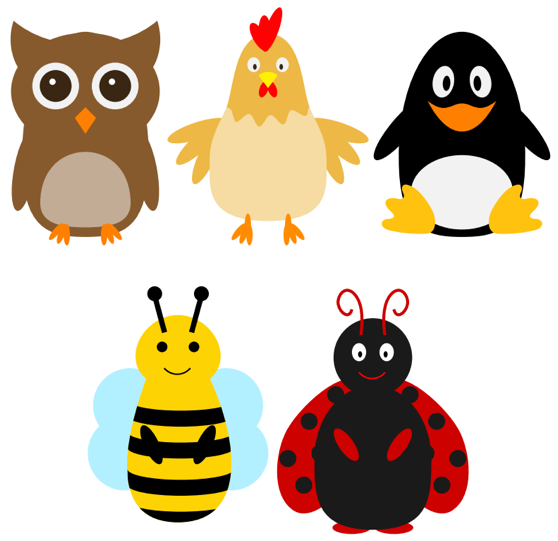
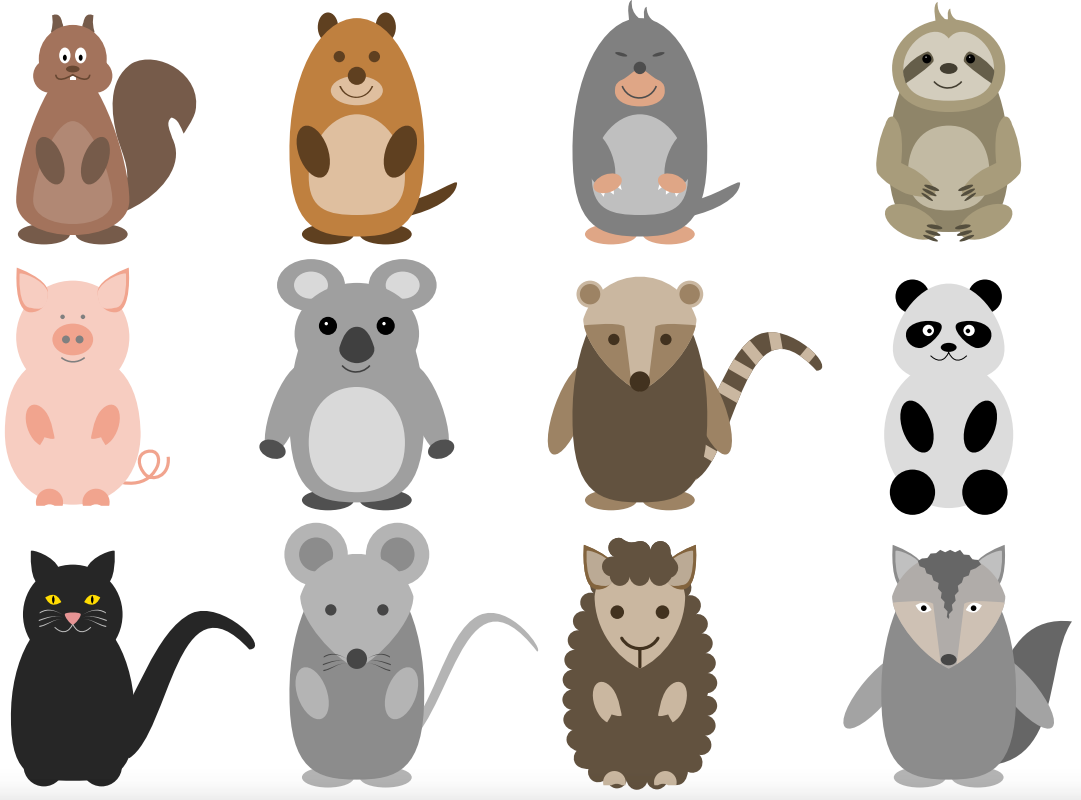
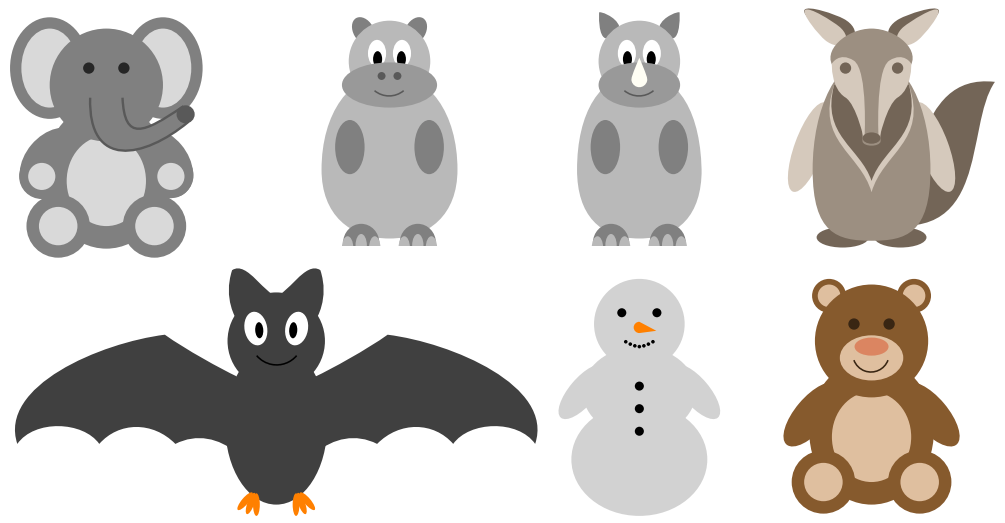
Figure 15.3, 15.4, 15.5 – TikZlings
\documentclass[tikz,border=10pt]{standalone}
\usetikzlibrary {positioning,matrix}
\usepackage{tikzlings}
\begin{document}
\begin{tikzpicture}
  \node (birds) [matrix] {
\owl & \chicken] & \penguin \\ };
  \node [matrix, below = 0 cm of birds] {
    \bee & \bug &  \\ };
\end{tikzpicture}
\begin{tikzpicture}
  \matrix[nodes={minimum width=6cm}] {
    \squirrel & \marmot & \moles & \sloth \\
   \pig & \koala & \coati & \panda[body=lightgray]\\
    \cat & \mouse & \sheep & \wolf\\
  };
\end{tikzpicture}
\begin{tikzpicture}
  \matrix[nodes={minimum width=6cm}] {
    \elephant \hippo[xshift=2.5cm] & \rhino & \anteater \\
    \bat[xshift=1.5cm] & \snowman[body=gray!35] & \draw (1.7,0) node{};\bear \\ };
\end{tikzpicture}
\end{document}

Figure 15.6 – Variations of drawing a TikZling
\documentclass[tikz,border=10pt]{standalone}
\usetikzlibrary {positioning,matrix}
\usepackage{tikzlings}
\begin{document}
\begin{tikzpicture}
  \node (birds) [matrix] {
    \pig & \pig[back] & \pig[3D] & \pig[contour]\\
  };
\end{tikzpicture}
\end{document}

Figure 15.7 – A teddy bear wearing a T-shirt
\documentclass[tikz,border=10pt]{standalone}
\usetikzlibrary {positioning,matrix}
\usepackage{tikzlings}
\tikzset{bat/.pic={\bat}}
\usepackage{bearwear}
\begin{document}
\begin{tikzpicture}
  \bear
  \bearwear[shirt={shade, top color=yellow, bottom color=red},
    body deco={\node[scale=0.5] at ([yshift=0.8mm]bearheart) {\tiny TikZ};
  \pic at (beartummy)[scale=0.18,yshift=-1cm]{bat} ;}]
\end{tikzpicture}
\end{document}

Figure 15.8 – Snowman variations
\documentclass[border=2pt]{standalone}
\usepackage{scsnowman}
\begin{document}
\scsnowman[scale=2.5]\hspace{-0.3mm}
\scsnowman[scale=2.5,hat,snow=blue,arms,buttons,note=red]
\scsnowman[scale=2.5,muffler=red,arms,hat=blue,broom=brown]
\end{document}

Figure 15.9 – A penguin
\documentclass[tikz,border=10pt]{standalone}
\usepackage{tikzpingus}
\begin{document}
\tikz{\pingu}
\end{document}

Figure 15.10 – A penguin with accessories
\documentclass[tikz,border=10pt]{standalone}
\usepackage{tikzpingus}
\begin{document}
\begin{tikzpicture}
\pingu[eyes shiny, crown, gold medal, right wing wave]
\end{tikzpicture}
\end{document}
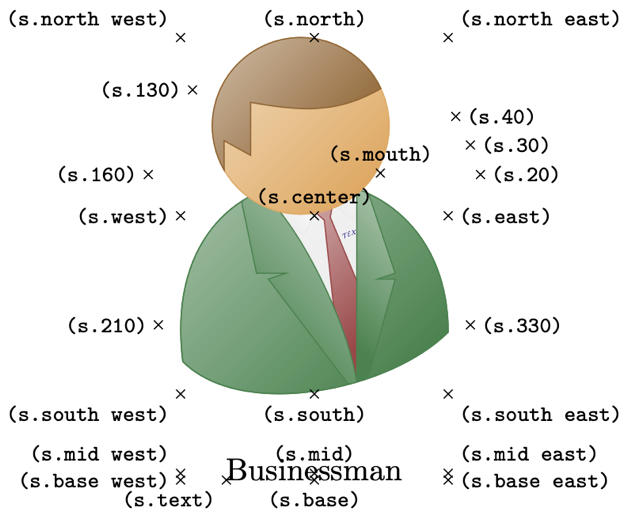
Figure 15.11 – A human shape
% based on an example in the tikzpeople manual
\documentclass[tikz,border=2pt]{standalone}
\usepackage{tikzpeople}
\begin{document}
\begin{tikzpicture}
  \node[name=s, shape=businessman, monogramtext=TEX, minimum width=3cm]
    {Businessman\rule{0pt}{0.8cm}};
  \foreach \anchor/\placement in
    { north west/above left, north/above, north east/above right,
      west/left, center/above, east/right,
      mid west/above left, mid/above, mid east/above right,
      base west/left, base/below, base east/right,
      south west/below left, south/below, south east/below right,
      text/below left, 20/right, 30/right, 40/right, 130/left,
	  160/left, 210/left, 330/right, mouth/above}
  \draw[shift=(s.\anchor)] plot[mark=x] coordinates{(0,0)}
    node[\placement] {\scriptsize\texttt{(s.\anchor)}};
\end{tikzpicture}
\end{document}

Figure 15.12 – A human shape example
\documentclass[tikz,border=10pt]{standalone}
\usetikzlibrary{shapes.callouts}
\usepackage{tikzpeople}
\begin{document}
\begin{tikzpicture}
  \node[name=k, shape=maninblack, minimum size=1cm] {};
  \node[ellipse callout, xshift=1.2cm, draw,yshift= .3cm,
    callout absolute pointer={(k.mouth)},
    font=\tiny\sffamily, align=center, inner sep=1pt]
    {Please,\\stand back.};
\end{tikzpicture}
\end{document}
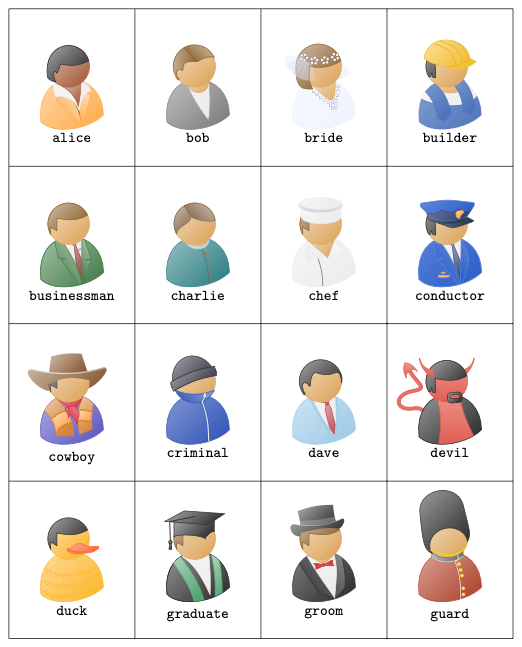
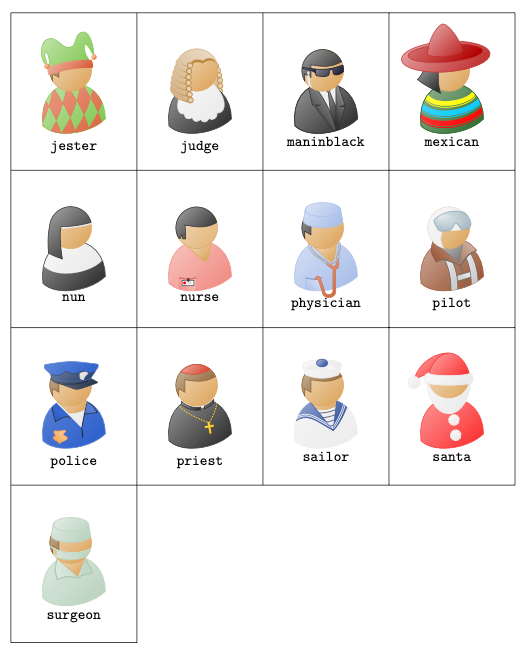
Figure 15.13, 15.14 – A variety of human shapes
\documentclass{article}
\usepackage[demo]{tikzpeople}
\begin{document}
\alltikzpeople{1.5}{}
\end{document}
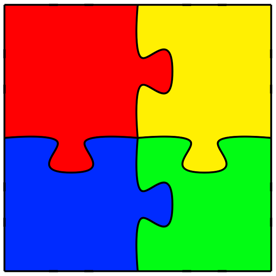
Figure 15.15 – A mini Jigsaw puzzle
\documentclass[tikz,border=10pt]{standalone}
\usepackage{jigsaw}
\usepackage{worldflags}
\begin{document}
\begin{tikzpicture}
\piece[red]{-1}{-1}{0}{0}
% Now scopes for shifting:
\begin{scope}[shift={(0,-1)}]
\piece[blue]{0}{-1}{1}{0}
\end{scope}
\begin{scope}[shift={(1,0)}]
\piece[yellow]{-1}{0}{0}{1}
\end{scope}
\begin{scope}[shift={(1,-1)}]
\piece[green]{0}{0}{1}{1}
\end{scope}
\end{tikzpicture}
\end{document}
The mini Jigsaw puzzle as a matrix:
\documentclass[tikz,border=10pt]{standalone}
\usepackage{jigsaw}
\usetikzlibrary{matrix}
\begin{document}
\begin{tikzpicture}
  \matrix[column sep=-0.315cm, row sep=-0.315cm] {
    \piece[red,overlay]{-1}{-1}{0}{0}
  & \piece[yellow]{-1}{0}{0}{1} \\
    \piece[blue]{0}{-1}{1}{0}
  & \piece[green]{0}{0}{1}{1} \\ };
\end{tikzpicture}
\end{document}
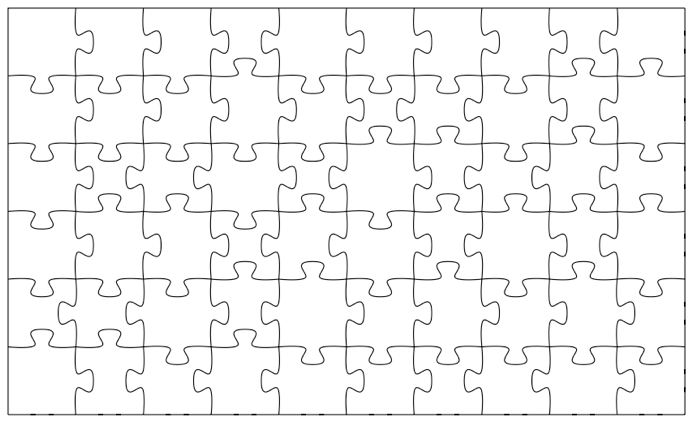
Figure 15.16 – A bigger Jigsaw puzzle
\documentclass[tikz,border=10pt]{standalone}
\usepackage{jigsaw}
\begin{document}
\begin{tikzpicture}
\jigsaw{10}{6}
\end{tikzpicture}
\end{document}
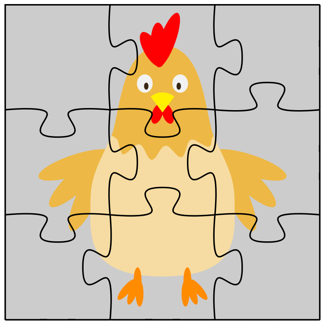
Figure 15.17 – A Jigsaw puzzle with a picture
\documentclass[tikz,border=10pt]{standalone}
\usepackage{jigsaw}
\usepackage{tikzlings}
\tikzset{chicken/.pic={\chicken}}
\begin{document}
\begin{tikzpicture}
  \fill[gray!40] (0,0) rectangle (3,3);
  \pic[scale=1.25] at (1.5,0){chicken};
  \jigsaw{3}{3}
\end{tikzpicture}
\end{document}
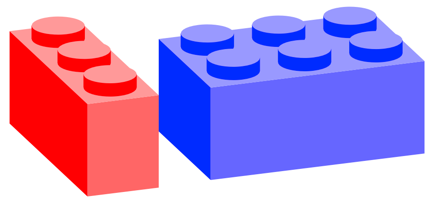
Figure 15.18 – Colored bricks
\documentclass[tikz,border=10pt]{standalone}
\usepackage{tikzbricks}
\begin{document}
\begin{tikzpicture}
  \node [matrix] {
  \brick[color=red]{1}{3} &
  \brick[color=blue,yshift=(0.13cm)]{3}{2} \\};
\end{tikzpicture}
\end{document}
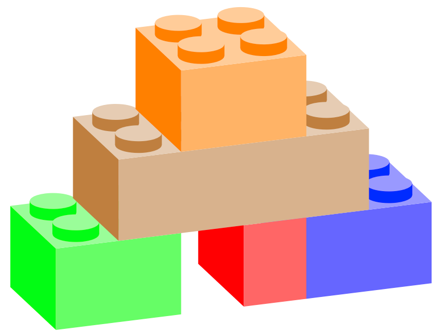
Figure 15.19 – A wall of colored bricks
\documentclass[tikz,border=10pt]{standalone}
\usepackage{tikzbricks}
\begin{document}
\begin{wall}
  \wallbrick[color=blue]{2}{2}
  \wallbrick[color=red]{1}{2}
  \stepcounter{brickx}
  \wallbrick[color=green]{2}{2}
  \newrow
  \stepcounter{brickx}{1}
  \wallbrick[color=brown]{4}{2}
  \newrow
  \addtocounter{brickx}{2}
  \wallbrick[color=orange]{2}{2}
\end{wall}
\end{document}

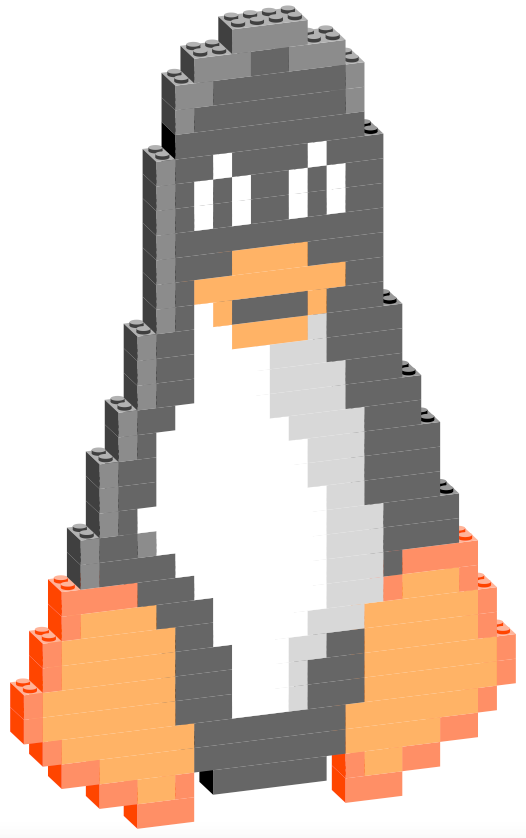
Figure 15.20, 15.21 – Tux, the penguin, built with bricks
\documentclass[tikz,svgnames,border=20pt]{standalone}
\usepackage{tikzbricks}
\begin{document}
\begin{wall}
  \addtocounter{brickx}{6}
  \wallbrick[color=OrangeRed]{3}{2}
  \addtocounter{brickx}{8}
  \wallbrick[color= OrangeRed]{3}{2}
  \newrow
%
  \addtocounter{brickx}{4}
  \wallbrick[color=OrangeRed]{2}{2}
  \wallbrick[color=orange]{2}{2}
  \wallbrick[color=OrangeRed]{1}{2}
  \stepcounter{brickx}
  \wallbrick[color=black]{6}{2}
  \stepcounter{brickx}
  \wallbrick[color=OrangeRed]{1}{2}
  \wallbrick[color=orange]{2}{2}
  \wallbrick[color=OrangeRed]{2}{2}
  \newrow
%
  \addtocounter{brickx}{2}
  \wallbrick[color=OrangeRed]{2}{2}
  \wallbrick[color=orange]{5}{2}
  \wallbrick[color=black]{8}{2}
  \wallbrick[color=orange]{5}{2}
  \wallbrick[color=OrangeRed]{2}{2}
  \newrow
%
  \addtocounter{brickx}{1}
  \wallbrick[color=OrangeRed]{1}{2}
  \wallbrick[color=orange]{7}{2}
  \wallbrick[color=black]{8}{2}
  \wallbrick[color=orange]{7}{2}
  \wallbrick[color=OrangeRed]{1}{2}
  \newrow
%
  \wallbrick[color=OrangeRed]{1}{2}
  \wallbrick[color=orange]{7}{2}
  \wallbrick[color=black]{3}{2}
  \wallbrick[color=lightgray]{1}{2}
  \wallbrick[color=white]{3}{2}
  \wallbrick[color=black]{3}{2}
  \wallbrick[color=orange]{7}{2}
  \wallbrick[color=OrangeRed]{1}{2}
  \newrow
%
  \wallbrick[color=OrangeRed]{1}{2}
  \wallbrick[color=orange]{7}{2}
  \wallbrick[color=black]{3}{2}
  \wallbrick[color=lightgray]{1}{2}
  \wallbrick[color=white]{3}{2}
  \wallbrick[color=black]{3}{2}
  \wallbrick[color=orange]{7}{2}
  \wallbrick[color=OrangeRed]{1}{2}
  \newrow
%
  \addtocounter{brickx}{1}
  \wallbrick[color=OrangeRed]{1}{2}
  \wallbrick[color=orange]{6}{2}
  \wallbrick[color=black]{2}{2}
  \wallbrick[color=lightgray]{2}{2}
  \wallbrick[color=white]{3}{2}
  \wallbrick[color=black]{3}{2}
  \wallbrick[color=orange]{6}{2}
  \wallbrick[color=OrangeRed]{1}{2}
  \newrow
%
  \addtocounter{brickx}{1}
  \wallbrick[color=OrangeRed]{1}{2}
  \wallbrick[color=orange]{6}{2}
  \wallbrick[color=lightgray]{3}{2}
  \wallbrick[color=white]{5}{2}
  \wallbrick[color=black]{2}{2}
  \wallbrick[color=orange]{6}{2}
  \wallbrick[color=OrangeRed]{1}{2}
  \newrow
%
  \addtocounter{brickx}{2}
  \wallbrick[color=OrangeRed]{1}{2}
  \wallbrick[color=orange]{3}{2}
  \wallbrick[color=OrangeRed]{1}{2}
  \wallbrick[color=lightgray]{3}{2}
  \wallbrick[color=white]{6}{2}
  \wallbrick[color=black]{3}{2}
  \wallbrick[color=orange]{4}{2}
  \wallbrick[color=OrangeRed]{1}{2}
  \newrow
%
%  \addtocounter{brickx}{2}
%  \wallbrick[color=OrangeRed]{1}{2}
%  \wallbrick[color=orange]{3}{2}
%  \wallbrick[color=OrangeRed]{1}{2}
%  \wallbrick[color=lightgray]{3}{2}
%  \wallbrick[color=white]{6}{2}
%  \wallbrick[color=black]{3}{2}
%  \wallbrick[color=orange]{4}{2}
%  \wallbrick[color=OrangeRed]{1}{2}
%  \newrow
%
  \addtocounter{brickx}{2}
  \wallbrick[color=OrangeRed]{4}{2}
  \wallbrick[color=black]{1}{2}
  \wallbrick[color=lightgray]{3}{2}
  \wallbrick[color=white]{7}{2}
  \wallbrick[color=black]{3}{2}
  \wallbrick[color= OrangeRed]{4}{2}
  \newrow
%
  \addtocounter{brickx}{3}
  \wallbrick[color=black]{4}{2}
  \wallbrick[color=lightgray]{3}{2}
  \wallbrick[color=white]{8}{2}
  \wallbrick[color=black]{4}{2}
  \wallbrick[color=darkgray]{1}{2}
  \newrow
%
  \addtocounter{brickx}{3}
  \wallbrick[color=black]{4}{2}
  \wallbrick[color=lightgray]{3}{2}
  \wallbrick[color=white]{9}{2}
  \wallbrick[color=darkgray]{1}{2}
  \wallbrick[color=black]{2}{2}
  \wallbrick[color=darkgray]{1}{2}
  \newrow
%
  \addtocounter{brickx}{4}
  \wallbrick[color=black]{4}{2}
  \wallbrick[color=lightgray]{2}{2}
  \wallbrick[color=white]{10}{2}
  \wallbrick[color=black]{1}{2}
  \wallbrick[color=darkgray]{1}{2}
  \newrow
%
  \addtocounter{brickx}{4}
  \wallbrick[color=black]{4}{2}
  \wallbrick[color=lightgray]{3}{2}
  \wallbrick[color=white]{8}{2}
  \wallbrick[color=black]{2}{2}
  \wallbrick[color=darkgray]{1}{2}
  \newrow
%
  \addtocounter{brickx}{4}
  \wallbrick[color=black]{4}{2}
  \wallbrick[color=lightgray]{3}{2}
  \wallbrick[color=white]{8}{2}
  \wallbrick[color=black]{2}{2}
  \wallbrick[color=darkgray]{1}{2}
  \newrow
%
  \addtocounter{brickx}{5}
  \wallbrick[color=black]{3}{2}
  \wallbrick[color=lightgray]{4}{2}
  \wallbrick[color=white]{7}{2}
  \wallbrick[color=black]{1}{2}
  \wallbrick[color=darkgray]{1}{2}
  \newrow
%
  \addtocounter{brickx}{5}
  \wallbrick[color=black]{4}{2}
  \wallbrick[color=lightgray]{4}{2}
  \wallbrick[color=white]{5}{2}
  \wallbrick[color=black]{2}{2}
  \wallbrick[color=darkgray]{1}{2}
  \newrow
%
  \addtocounter{brickx}{6}
  \wallbrick[color=black]{3}{2}
  \wallbrick[color=lightgray]{4}{2}
  \wallbrick[color=white]{4}{2}
  \wallbrick[color=black]{2}{2}
  \wallbrick[color=darkgray]{1}{2}
  \newrow
%
  \addtocounter{brickx}{6}
  \wallbrick[color=black]{4}{2}
  \wallbrick[color=lightgray]{3}{2}
  \wallbrick[color=white]{4}{2}
  \wallbrick[color=black]{2}{2}
  \wallbrick[color=darkgray]{1}{2}
  \newrow
%
  \addtocounter{brickx}{6}
  \wallbrick[color=black]{4}{2}
  \wallbrick[color=lightgray]{1}{2}
  \wallbrick[color=orange]{4}{2}
  \wallbrick[color=white]{2}{2}
  \wallbrick[color=black]{2}{2}
  \wallbrick[color=darkgray]{1}{2}
  \newrow
%
  \addtocounter{brickx}{7}
  \wallbrick[color=black]{3}{2}
  \wallbrick[color=orange]{1}{2}
  \wallbrick[color=black]{4}{2}
  \wallbrick[color=orange]{1}{2}
  \wallbrick[color=white]{1}{2}
  \wallbrick[color=black]{1}{2}
  \wallbrick[color=darkgray]{1}{2}
  \newrow
%
  \addtocounter{brickx}{7}
  \wallbrick[color=black]{2}{2}
  \wallbrick[color=orange]{8}{2}
  \wallbrick[color=black]{1}{2}
  \wallbrick[color=darkgray]{1}{2}
  \newrow
%
  \addtocounter{brickx}{7}
  \wallbrick[color=black]{4}{2}
  \wallbrick[color=orange]{4}{2}
  \wallbrick[color=black]{3}{2}
  \wallbrick[color=darkgray]{1}{2}
  \newrow
%
  \addtocounter{brickx}{7}
  \wallbrick[color=black]{11}{2}
  \wallbrick[color=darkgray]{1}{2}
  \newrow
%
  \addtocounter{brickx}{7}
  \wallbrick[color=black]{2}{2}
  \wallbrick[color=white]{1}{2}
  \wallbrick[color=black]{1}{2}
  \wallbrick[color=white]{1}{2}
  \wallbrick[color=black]{2}{2}
  \wallbrick[color=white]{1}{2}
  \wallbrick[color=black]{1}{2}
  \wallbrick[color=white]{1}{2}
  \wallbrick[color=black]{1}{2}
  \wallbrick[color=darkgray]{1}{2}
  \newrow
%
  \addtocounter{brickx}{7}
  \wallbrick[color=black]{3}{2}
  \wallbrick[color=white]{1}{2}
  \wallbrick[color=black]{4}{2}
  \wallbrick[color=white]{1}{2}
  \wallbrick[color=black]{2}{2}
  \wallbrick[color=darkgray]{1}{2}
  \newrow
%
  \addtocounter{brickx}{8}
  \wallbrick[color=black]{10}{2}
  \newrow
%
  \addtocounter{brickx}{8}
  \wallbrick[color=darkgray]{1}{2}
  \wallbrick[color=black]{8}{2}
  \wallbrick[color=darkgray]{1}{2}
  \newrow
%
  \addtocounter{brickx}{8}
  \wallbrick[color=darkgray]{1}{2}
  \wallbrick[color=black]{7}{2}
  \wallbrick[color=darkgray]{2}{2}
  \newrow
%
  \addtocounter{brickx}{9}
  \wallbrick[color=darkgray]{3}{2}
  \wallbrick[color=black]{2}{2}
  \wallbrick[color=darkgray]{3}{2}
  \newrow
%
  \addtocounter{brickx}{11}
  \wallbrick[color=darkgray]{4}{2}
\end{wall}
  \stepcounter{brickx}
\end{document}
A different viewing angle:
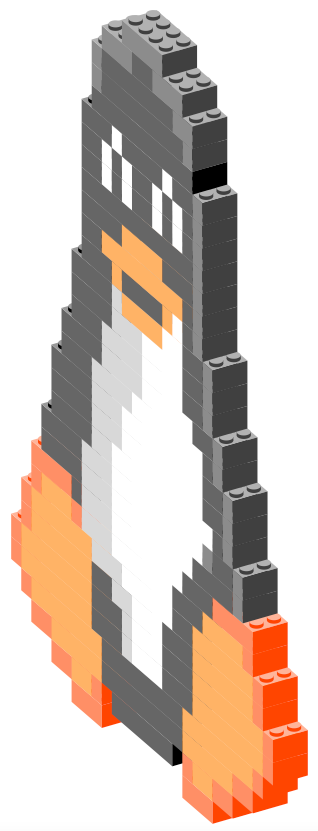
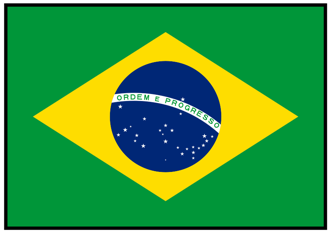
Figure 15.23 – The Brazilian flag
\documentclass[tikz,border=10pt]{standalone}
\usepackage{worldflags}
\begin{document}
\worldflag[width=2cm,framewidth=0.3mm,framecolor=black]{BR}
\end{document}

Figure 15.24 – A hippo with the flag of Malawi
\documentclass[tikz,border=10pt]{standalone}
\usepackage{tikzlings}
\usepackage{worldflags}
\begin{document}
\begin{tikzpicture}
  \hippo[body=brown!60!black,
    lightsaber=brown,
    think={\textsf{The end}}]
  \pic (mw) [country=MW,hang=20,rotate=-30,scale=0.5] at (1.02,1.1) {worldflag};
\end{tikzpicture}
\end{document}